How to Install the New Island of Fish Portable Rooftop Tent: A Step-by-Step Guide
Aug. 17, 2023 Harry
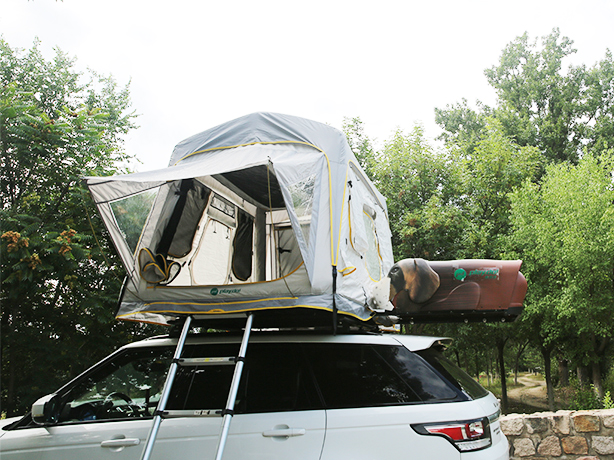
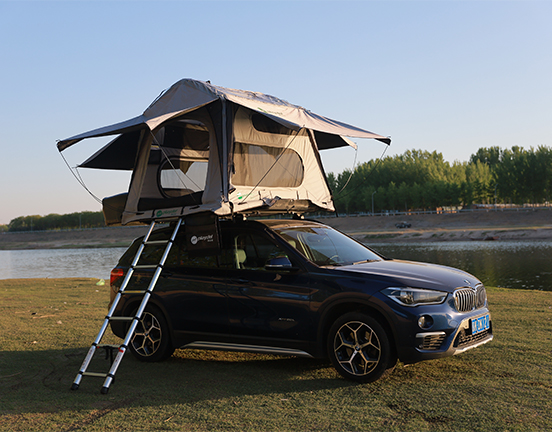
The New Island of Fish Portable Rooftop Tent is a versatile and innovative product that offers a multifunctional solution for outdoor and indoor adventures. Whether you're planning a fishing trip, a camping adventure, or simply looking for a cozy indoor retreat for your children, the Island of Fish has got you covered. In this article, we'll guide you through the step-by-step installation process of this extraordinary rooftop tent.
Before Departure Installation:
Unzip the storage bag and take out the Island of Fish rooftop tent.
Open and spread out the tent.
Take out the electric air pump and connect one end of the inflation hose to the pump's inflation port (INFLATION).
Connect the other end of the hose to the spiral inflation nozzle.
Insert the inflation nozzle into the Island of Fish air mattress inflation port. Slightly turn it to the left before inserting, then turn it to the right to tighten.
Plug the electric air pump power cord into the car's cigarette lighter socket. (Note: Start the car to meet the power requirements of the electric air pump.)
Set the electric air pump to 13PSI using the "PSI/BAR" and "+" and "-" buttons, then press the switch to start the pump.
Turn the inflation nozzle to the left to remove it, and cover the Island of Fish air mattress inflation port.
Lift the tent onto the car roof and adjust its position.
Open the accessory bag and take out the four short straps.
Thread the short straps through the air mattress bottom straps and secure them to the car roof crossbars. (Repeat for the other three straps.)
Take out the ratchet straps, place one end with the ratchet on the air mattress, and throw the other end over the crossbars to the opposite side.
Thread the strap through the roof crossbars and one end through the tensioner.
Move the tensioner handle back and forth until tight.
Tuck away the excess straps.
Install the second ratchet strap in the same way.
Pack up the accessory bag and put it, along with the telescopic ladder, in the trunk. You're ready to go!
Installation at the Destination:
Remove the ratchet straps. (Press the buckle and pull it outward, lift the spring plate, open the tensioner to a horizontal position, and remove the straps.)
Collect the two ratchet straps.
Check if the Island of Fish rooftop tent is securely fixed to the crossbars. (If not, use the four 6-meter long straps for reinforcement. If secure, skip steps 4-6.)
Take out the four 6-meter long straps from the accessory bag.
Thread the long straps through the air mattress bottom, D-rings, and wheel hubs.
Secure the other three 6-meter long straps to the vehicle wheel hubs in the same way.
Open the telescopic ladder, secure it with straps, and adjust it to the appropriate height.
Unzip and remove the dust and rain cover.
Climb the ladder and check if the air column inflation port is closed.
Open the air mattress and air column connection valve, turn the air mattress switch counterclockwise to inflate the air column. Once inflated, turn the switch clockwise to close it and lock the connection valve.
Install the shoelaces.
Install the sunshade curtain: zip it up, attach the Velcro on both sides, and set up the sunshade and rain curtain poles. (Install the sunshade and rain curtain based on your needs.)
Installation is complete!
Follow the video instructions step by step, and the installation of the Island of Fish Portable Rooftop Tent will be a breeze. Palatu is dedicated to providing portable rooftop tents for families, creating a platform for companionship, communication, and connection.
Disassembly and Storage:
Clear all items from the tent.
Remove all sunshade and rain curtains.
Close the doors and windows, leaving a small gap for air to escape during storage.
Open the air column exhaust port to deflate.
Neatly arrange the tent body.
Install the dust and rain cover and zip it closed.
Store the telescopic ladder.
If you used reinforcement straps, remove the four 6-meter long straps.
Take out the ratchet straps, place one end with the ratchet on the air mattress, and throw the other end over the crossbars to the opposite side. Follow the video instructions to thread the straps through the crossbars, pass one end through the tensioner, move the tensioner handle back and forth until tight, and tuck away the excess straps.
Install the second ratchet strap in the same way.
Collect the accessories in the accessory bag, and put the bag and telescopic ladder in the trunk. You're ready to continue your journey or head home.
If you choose to continue your journey, replenish the air in the Island of Fish rooftop tent air columns.
If you choose to go home, remove the ratchet straps and four short straps securing the tent to the roof crossbars once you arrive.
Lower the Island of Fish rooftop tent to the ground.
Deflate the air mattress: open the air mattress inflation port cover, press inward and turn right to the deflation mode.
Fold the deflated Island of Fish rooftop tent in thirds, and secure it with binding straps.
Take out the Island of Fish rooftop tent storage bag, and put in the telescopic ladder, tent, and accessory bag. Zip up the storage bag.
The Island of Fish rooftop tent is now stored.
Follow the video instructions step by step, and the disassembly and storage of the Island of Fish Portable Rooftop Tent will be a breeze. Palatu is dedicated to providing portable rooftop tents for families, creating a platform for companionship, communication, and connection.


